Posts

Featured

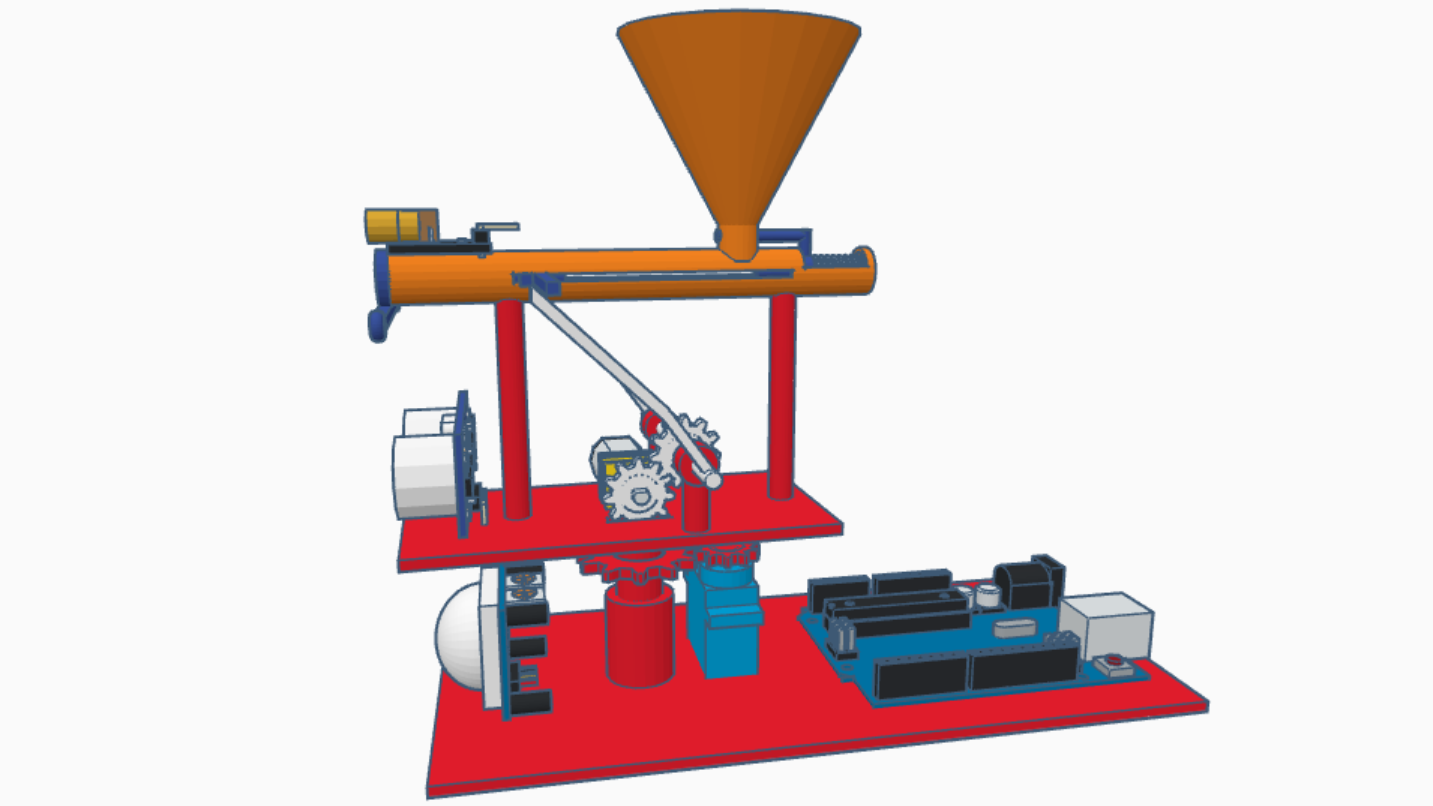
Weapon Prototype

Image
Turret  Prototype 01 With DC motor as a gun controller With 360 degrees servo as a gun controller YouTube:  Video Circuit: Code: (With DC motor as gun controller, this code is under modification) #include <Servo.h> #include <HCSR04.h> Servo base; void rotateBase(); void shoot(); int pir = 5; int trig = 11; int echo = 10; int laser = 13; int gun = 3; int motion = 0, detect = 0, shot = 0, minDistance = 100; long distance = 0; float duration = 0; float oneRotation = 10.87; //DC Motor's one rotation time taken in ms int loaded = 0; void setup() {   base.attach(2);   pinMode(pir, INPUT);   pinMode(laser, OUTPUT);   pinMode(trig, OUTPUT);   pinMode(echo, INPUT);   Serial.begin(9600);   base.write(90);   digitalWrite(laser, OUTPUT);   digitalWrite(gun, OUTPUT); } void loop() {   motion = digitalRead(pir);   if (motion == 1)   {     digitalWrite(laser, 1);     rotateBase();   }   else   {     digitalWrite(laser, 0);   } } void rotateBase() {   int basePos = 90;   for (basePos =

Clap Circuit

Image
   Clap Circuit with microphone using Arduino Uno You Tube:  Video Circuit: Code: int clap = 2; int led = 13; int val = 0; int valold = 0; int state = 0; void setup() {   pinMode(clap, INPUT);   pinMode(led, OUTPUT); } void loop() {   val = digitalRead(clap);      if((val == HIGH) && (valold == LOW)) {     state = 1- state;     delay(10);   }      valold = val;      if (state == 1) {     digitalWrite(led, HIGH);   }   else {     digitalWrite(led, LOW);   } }

Smart Door

Image
 Smart Door using Arduino Uno YouTube:  Video Circuit: Code: int bulb = 13; int ir1 = 6; int ir2 = 7; int count = 0; void setup() {   pinMode(bulb, OUTPUT);   pinMode(ir1, INPUT);   pinMode(ir2, INPUT);   Serial.begin(9600);   count = 0; } void loop() {    if(digitalRead(ir1)== LOW && digitalRead(ir2)== HIGH)   {     count++;     Serial.print("Count:");     Serial.println(count);     delay(1000);   }      else if(digitalRead(ir2)== LOW && digitalRead(ir1)== HIGH)   {     count--;     Serial.print("Count:");     Serial.println(count);     delay(1000);   }     if(count > 0)   {     digitalWrite(bulb, HIGH);     //Serial.println("Lights ON");   }   else   {      digitalWrite(bulb, LOW);      //Serial.println("Lights OFF");   } }

Keypad locker system

Image
 Locker Prototype 01 Circuit: Simulate Code: #include <Keypad.h> #include <Servo.h> Servo servo1; int servoPin = 11; int pos; int indicator = 12; const byte ROWS = 4;  const byte COLS = 4;  char hexaKeys[ROWS][COLS] = {   {'1', '2', '3', 'A'},   {'4', '5', '6', 'B'},   {'7', '8', '9', 'C'},   {'*', '0', '#', 'D'} }; byte rowPins[ROWS] = {2,3,4,5};  byte colPins[COLS] = {6,7,8,9};  Keypad customKeypad = Keypad(makeKeymap(hexaKeys), rowPins, colPins, ROWS, COLS);  int pass = 0; void setup(){   servo1.attach(servoPin);   servo1.write(0);   Serial.begin(9600);   Serial.println("Enter the password");   Serial.println("Enter C for clear");   Serial.println("Enter D for Lock");   pinMode(indicator, OUTPUT);   digitalWrite(indicator, 0); }    void loop(){   char customKey = customKeypad.getKey();      if (customKey){    // Ser

Basic Remote control car

Image
 Basic Remote control car with IRremote Prototype 01 YouTube:  video   Circuit: The LEDs connected in the circuit indicates that they are connected to 2 wheels of the car respectively with the help of motor driver. YouTube:  Video Code 1: (Basic remote control car without password) #include <IRremote.h> int RECV_PIN = 2; IRrecv sensor(RECV_PIN); decode_results value1; #define front 1904 #define back 3952 #define right 752 #define left 2800 void forward(); void backward(); void turnleft(); void turnright(); void Stop(); int m1p1 = 6; int m1p2 = 7; int m2p1 = 8; int m2p2 = 9; int led = 13; int number = 0, value = 0; void setup() {   Serial.begin(9600);   sensor.enableIRIn();   pinMode(led, OUTPUT);   pinMode(m1p1, OUTPUT);   pinMode(m1p2, OUTPUT);   pinMode(m2p1, OUTPUT);   pinMode(m2p2, OUTPUT); } void loop() {   if (sensor.decode(&value1)) {     unsigned int state = value1.value;     if (state == 2704 ) {       digitalWrite(led, HIGH);       value = 1;     }     sensor.resume

Distansometer

Image
Distance measuring device It is a device used to  measure the distance between two objects or walls without practically touching them. Just place the device anywhere between the objects and the LCD screen displays distance measured. Model : Youtube:  video Prototype 01  Circuit: Components: Code: #include <Adafruit_LiquidCrystal.h> Adafruit_LiquidCrystal lcd_1(0); int echo1 = 9; int trig1 = 8; int echo2 = 6; int trig2 = 7; float duration1, distance1; float duration2, distance2; int d = 10;  //d is Distance between two HC-SR04 int totalDistance = 0; void setup() {   lcd_1.begin(16, 2);   lcd_1.print("Distance:");   pinMode(trig1, OUTPUT);   pinMode(echo1, INPUT);   pinMode(trig2, OUTPUT);   pinMode(echo2, INPUT);   Serial.begin(9600); } void loop() {   digitalWrite(trig1, LOW);   delayMicroseconds(2);   digitalWrite(trig1, HIGH);   delayMicroseconds(10);   digitalWrite(trig1, LOW);   duration1 = pulseIn(echo1, HIGH);   distance1 = (duration1*0.0343)/2;   Serial.println(d